PrestaShop Tutorial: How to Install, Set Up a Site, and More
If you are looking for a reliable eCommerce platform to turn your business idea into an online store, PrestaShop is an excellent choice.
Download Website Launch Checklist
PrestaShop is an open-source eCommerce content management system that helps you easily create, manage, and design an online store for free. There are currently 300,000+ live websites using PrestaShop, making it the 6th most popular open-source platform.
The platform is known for its ease of use, making it suitable for business owners who want to make money online with minimum website development knowledge.
This PrestaShop tutorial will guide you step-by-step on setting up an eCommerce site, whether you use the manual or auto-installation method.
Why Use PrestaShop?
PrestaShop is known for its easy installation and user-friendly interface.
Its installation process does require some technical skills, but the main dashboard is easy to navigate. You can monitor sales, orders, and profits from the dashboard, and if you need to access any parts of your store, the main menu panel can be accessed from the left side of the screen.
This eCommerce platform also provides all essential eCommerce infrastructure, such as payment methods and store management tools, and offers customization for nearly every aspect of the website.
Moreover, PrestaShop also has several other strengths that make it stand out from other eCommerce platforms:
- Built-in inventory management system. It’ll be easier to manage trending products, orders, stocks, and customers.
- Thousands of templates. PrestaShop has over 3,200 official and third-party themes and templates that are highly customizable, responsive, and SEO-optimized.
- Thousands of modules. Extend the functionality of the online shop, increasing traffic, improving conversion rates, and building customer loyalty.
- Robust marketing features. Boost your business’ marketing effort with features such as SEO optimization, coupons, and email marketing.
- Hundreds of payment gateways – 250 popular, third-party payment gateway providers such as Stripe and Discover Global are available. They enable direct payment from your store, so customers can purchase any products without going to another site.
- Completely free – PrestaShop is open source, free to download and install. However, most official themes and some of the modules in the PrestaShop marketplace are premium. Still, the free resources are sufficient to build a functional online store.
PrestaShop is one of the most popular eCommerce platforms in Europe, especially in Spain, Italy, and France. It’s also among the top six global favorite eCommerce platforms to migrate to.
How to Install PrestaShop (Tutorial)
There are two ways to install PrestaShop – using an auto-installer or doing it manually.
The PrestaShop auto-installer is a feature provided by most hosting providers to help non-tech savvy users.
If you use Hostinger as your hosting provider, follow this PrestaShop tutorial to use the auto-installer:
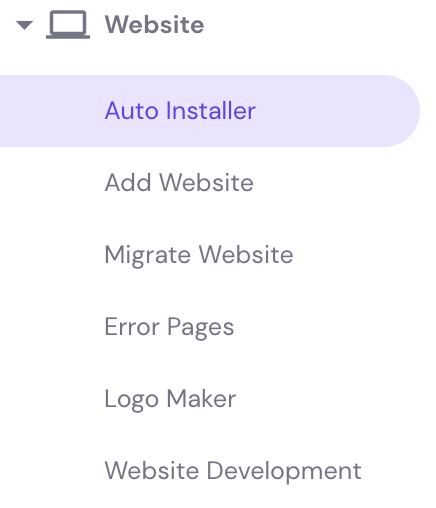
- Log in to hPanel, then navigate to Website → Auto-Installer.
- On the Auto-Installer page, choose Other → Select.

- The Search an application section will appear. Type PrestaShop into the search bar, and click the Select button.

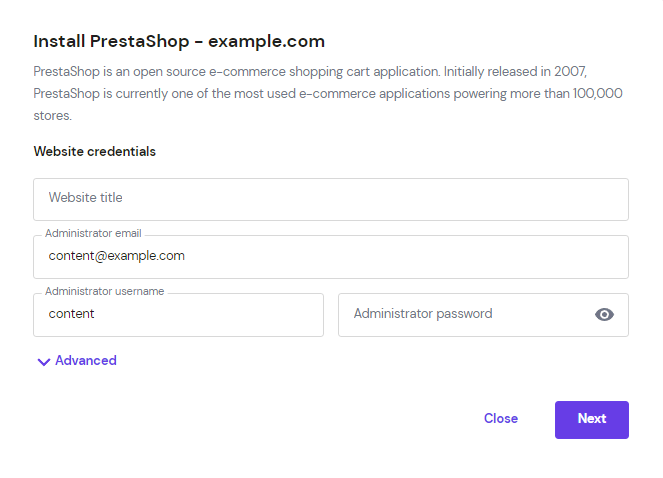
- You’ll see an Install PrestaShop form popping up. Fill in the Administrator Username, Administrator Password, Administrator Email, and Website Title fields. Under the Database field, choose Create New Database. Leave the other fields as they are.
Pro Tip
If you want to install PrestaShop on a subdirectory such as http://yoursite.com/store, enter its name on the Enter subcategory field.
- Once you’re done, click Install.
After the installation is finished, the PrestaShop website will be on the list of installed applications.

Now, access the PrestaShop login menu by going to your admin URL.
Here’s how to find your PrestaShop admin URL:
- On hPanel’s main dashboard, navigate to the Website section. Select Auto Installer.
- Under the Installed Applications section, click the three vertical dots next to your Prestashop URL and select Details.

- On the Application Details window, you’ll find the Admin URL. Click on it to go to the PrestaShop login page.

- Fill in your email address and password. Click Log In.

You’ve successfully created a PrestaShop site.
Manual Installation
Manually installing PrestaShop takes more time and requires some technical knowledge, but we will guide you through all the steps in this PrestaShop tutorial.
First, let’s download the PrestaShop software.
- Go to the Prestashop download page to get its latest version. Click Select your profile – as a seller, choose Merchant.

- Select the planned launch date of your online shop by clicking on the drop-down menu – the options range from less than a month to more than six months. Then, enter your email address.
- Tick the checkboxes to agree to its Terms and Conditions of Use and the Data protection policy. Click the Download button.
- Save the installation .zip file, then extract it. You’ll see that the PrestaShop installation package consists of three files – index.php, Install_PrestaShop.html, and prestashop.zip.
Next, let’s proceed with the installation. To install PrestaShop manually, you’ll need to upload the extracted installation package to the /public_html/ directory or a subdirectory such as /public_html/store. You can use the control panel’s file manager or an FTP client like FileZilla to do so.
If you choose to use an FTP client, find the login information in hPanel’s FTP Accounts menu to connect to the FTP server.
To install PrestaShop using hPanel’s file manager, follow the steps below:
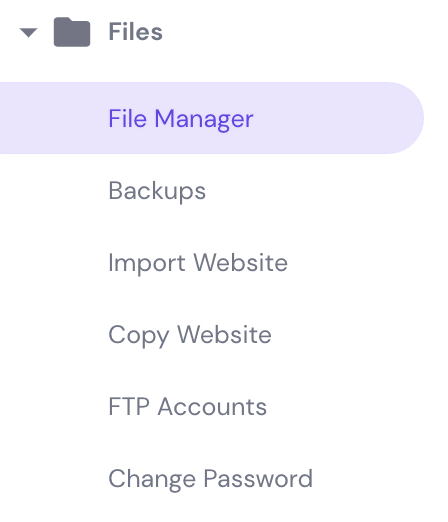
- Under the Files section, click File Manager.
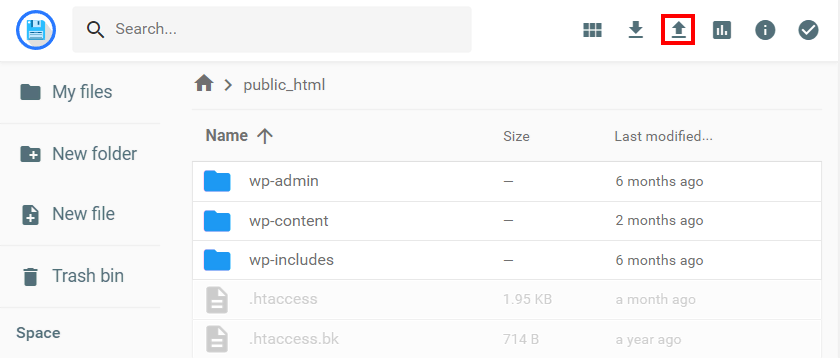
- We’re going to install PrestaShop in a root directory, so open the public_html folder. Then, click the Upload Files icon at the top-right.
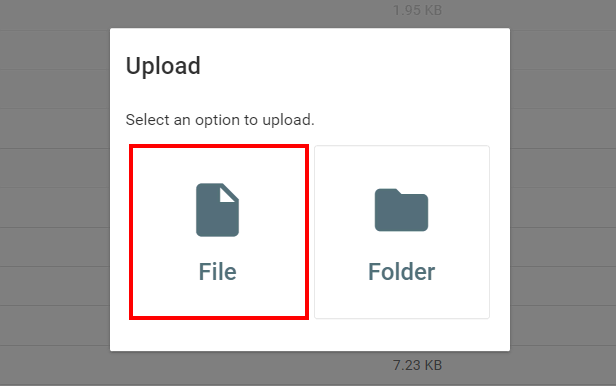
- A pop-up will appear. Click File and choose index.php and prestashop.zip from the PrestaShop installation package.
Next, create a new database to store your PrestaShop data.
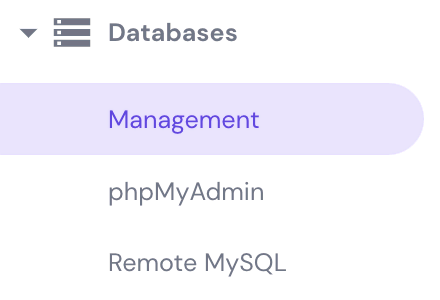
- On the hPanel, go to the Databases section and click Management.
- Enter the database name, username, and password – take note of the database information as you’ll need it later. Click Create.

Once you’ve created a new database, it will appear in the List of Current MySQL Databases and Users.
Now that you have everything you need to start the installation process, go to the URL assigned for your PrestaShop online store, such as yoursite.com.

Once the installation bar reaches 100%, the PrestaShop Installation Assistant will show up.
- Choose whether to continue the installation in English or another language by selecting it from the drop-down menu, then clicking Next.

- Tick the I agree to the above terms and conditions checkbox and click Next.

- Now, fill in the form with information about your store and account. PrestaShop also offers an option to install demo products to help you learn to use the platform.

- On the following page, enter the database information. If you use Hostinger as your hosting provider, the database server address is mysql.hostinger.com.

- Click the Test your database connection now! button to connect your database. Once you get the Database is connected message, click Next to install PrestaShop.
- If the installation is successful, you’ll see a page that says Your installation is finished! along with your PrestaShop login information.
- You will also get a warning message telling you to delete the /install folder. Delete the /install folder by going to hPanel → File Manager.

Navigate to http://yoursite.com/admin. The admin folder will be renamed automatically, and you’ll be able to access the admin panel via the new admin URL.
How to Set Up a PrestaShop Site
Now that you have installed the platform, it’s time to set up your PrestaShop website. This section of the PrestaShop tutorial will cover everything from setting up new pages to configuring currencies.

Set Up New Pages
First, you’ll need to create new custom pages.
PrestaShop automatically creates several basic pages like About us, Store Information, and Terms and conditions of use. However, like other online shops, you’ll also need pages such as blog, FAQ, or Seller Registration.
The pages you create will show up on the menu bar, making it easier for customers to navigate around your eCommerce site.
Follow the steps below to create a new page:
- Open your PrestaShop dashboard.
- On the left navigation panel, go to Design → Pages.

- On the upper-right corner of the Pages screen, click Add new page.

- Customize the new page:

- Page category. The default category is Home. It helps you classify and organize the pages you create.
- Page title. The default title of your page, which takes up the <h1> page tag. It will also be the default SEO title.
- Meta title. The title that will show up on search engine results pages (SERPs). If you leave it empty, they will show the page title instead.
- Meta description. A description of the page that will appear as a short excerpt on search engine results.
- Meta keywords. The keywords that describe your content.
- Friendly URL. A human-readable URL that can help your page rank higher.
- Page content. The editor supports HTML tags to structure and customize your page content easily. It includes formatting, setting headings, and embedding videos.
- Indexation by search engines. Choose Yes if you want search engines to index your page.
- Displayed. Choose Yes to display this page in your shop.
Important! Check the SEO preview to see how the meta title and meta description will appear on search engine results pages. Don’t include the characters ,=,{, or } in these two elements, or they will be considered invalid.
- Once you’re done, click Save or Save and Preview if you want to see the new page right away.
Next, let’s link that page to the menu bar.
- Navigate to Modules → Module Manager and type menu on the search bar.

- You will see the Main menu module as a result. Click Configure.
- On the left, the Selected Items column shows what’s already on the menu. The Available Items column contains pages available in your shop. Move the page you just created – in this example, Seller Registration – and click Add to move it to the Selected Items column. Then, hit the Save button.

- Now, check your site. The page link should appear on the top menu bar.
As for the pre-installed PrestaShop pages, here’s how to modify them:
- Go to Design → Pages, then scroll down to find the section that contains Pages in category Home. Click on the pen icon next to the page you want to modify.

- A form will appear – it’s the same as creating a page. Make the necessary changes, then click Save or Save and preview.

Install Themes
Luckily, designing a beautiful shop in PrestaShop doesn’t require advanced design or technical skills. The platform offers lots of appealing themes to choose from.
This section of the PrestaShop tutorial will explain how to install a new theme on your site.
- Open your Prestashop admin panel, then navigate to Design → Theme Catalog.

- Click Discover all of the themes to see all the available themes.
- It will take you to the PrestaShop Templates page on PrestaShop’s Official Addons Marketplace. The themes are organized by various characteristics, such as shop category, PrestaShop version, or included functionalities. Simply click on any theme to see its features and demo.

- Click Add to Cart to buy a theme.

- Click View my cart to review it, then click Proceed to checkout. PrestaShop accepts payment via Visa, Mastercard, and PayPal.
- On the admin panel, go to the Design → Theme & Logo section and click Use this theme.
All the themes on the PrestaShop marketplace are premium, but third-party websites like TemplateMonster and Apollotheme offer free PrestaShop themes.
Follow these steps to install a third-party theme on PrestaShop:
- Download a PrestaShop theme from any trusted sources. It will be a .zip file.

- Head over to your admin panel and go to Design → Theme & Logo.
- Access the theme importer by clicking on the Add New Theme button on the screen’s upper-right corner.

- On the Import from your computer section, select the .zip file of the theme you just downloaded. Then, click Save to upload it.

- Once you finish uploading the theme’s .zip file, navigate back to Design → Theme & Logo.

- Scroll down to My theme for My shop section and locate the new theme you just installed. Hover over its thumbnail, then click Use this theme to activate it.
- A pop-up will appear to confirm your choice. Click Yes.
These steps also apply when you want to change the current theme of your PrestaShop store.
Set Up Payment Methods
Now that your store design is taken care of, let’s move on to payment methods.
PrestaShop comes with two payment methods – bank transfer and check payment. If you want more payment gateway alternatives, you need to install payment modules like Amazon Pay, Stripe, and cash on delivery.
Let’s start with configuring the already active payment methods:
- From the admin panel, go to Payment → Payment Methods.

- Click Configure and fill in the necessary details.
- Bank transfer – Specify your account details and information for customers, such as the payment processing time. Your account details will be displayed during the checkout.
- Payments by check – Specify the payee and the address to where the check should be sent.
And here’s what you need to do to set up other payment gateways:
- Go to Modules → Module Catalog.

- Enter payment into the search bar, or choose Payment from the drop-down menu.
- Click the Install button on your chosen payment module. In this example, we’ll install the Amazon Pay module.
- Once it’s installed, a Configure button will appear. Click it.

- Follow the steps to configure and activate the module.

Important! Most methods require you to have an SSL certificate.
The payment method will automatically be available to your customer once it’s activated. Note that many payment providers allow you to run them in test mode beforehand.
If you stop using any of the payment gateways, remove them via the Module Manager.
Add Languages
PrestaShop makes it possible to add multiple languages to your eCommerce site to reach a wider audience. It has a feature to translate your content into 75 different languages, and the setup only takes a few minutes.
Here’s what you need to do to add a new language and set it to default:
- From your admin panel, navigate to International → Translations.

- On the Add / Update a language section, click the drop-down menu to select a language. After that, click the Add or update a language button.

- Once a new language is added, go to your site and refresh it. Now, visitors can choose a different language by clicking the drop-down menu on your site’s top bar. Repeat the process to add as many languages as you want.

If you want visitors to automatically view your site in a certain language without clicking the drop-down menu, you need to set that language as the default.
- Navigate to International → Localization.
- Under the Configuration section, click on the Default language drop-down menu, and choose a language. In this example, we’re going to set up German as the default language.
- Click Save to confirm, and you’re all set.

Add Products
This section of the PrestaShop tutorial will guide you in adding and managing products in your online shop.
- On the admin panel, go to Catalog → Products.

- Click the New product button on the top-right corner of the screen. If it’s your first time adding a product to PrestaShop, you can also click the Add your first product button in the middle of the page or import a list of products in formats like .csv or .xlsx.
- Enter your product name in the available field, then fill out the necessary details on each tab:
- Basic settings. Upload product pictures, a description, and other attributions. Also, put the product in specific categories for better product management and easier navigation.
- Quantities. Specify product quantity, stock details, and what behavior should be applied when your product is out of stock.
- Shipping. Set default delivery time, available carriers, and shipping fees.
- Pricing. Define retail price, cost price, and price rules.
- SEO. Set how the product page appears in search engine results, and choose a page redirect for when a product is unavailable.
- Options. Specify your products’ visibility, condition, and references, and if you offer product customization.
- Modules. Choose module-related options, if any.
- Once you’re done tweaking the product page, click Preview to see how it looks before actually publishing it.

- Click the Offline button to change it into Online, then click the Save button to complete the product page setup process.
Repeat the steps for each product you have.
Add an SSL Certificate
A Secure Sockets Layer (SSL) certificate is a data file that authenticates a website’s identity and establishes secure connections between a web browser and a web server.
As an eCommerce site owner, you need to guarantee that the user data and purchasing activity are secure. That’s why it’s essential to set up an SSL certificate on your website.
Moreover, having this certificate also helps your site rank higher on SERPs, as search engines will see your store as a reliable and trusted source.
Most domain registrars and hosting providers offer SSL certificates when you purchase a domain or hosting plan. If you use Hostinger, an SSL certificate is available as a lifetime service.
Follow the steps below to enable SSL on PrestaShop:
- Go to Shop Parameters → General.
- Click on Please click here to check if your shop supports HTTPS.

- If your shop supports SSL, you’ll see the green HTTPS icon next to your domain name. Simply switch Enable SSL and Enable SSL on all pages to Yes.
- Now check if the green HTTPS icon shows up on all pages of your store. If it doesn’t, you may need to clear the cache on your browser.
Set Up Currencies
Enable customers to pay in their local currencies using current exchange rates.
Follow the steps below to apply multi-currency in your PrestaShop online store:
- Go to International → Localization, then open the Currencies tab.

- Click Add new currency.

- Choose the currency you want to add and fill in the exchange rate calculated from your current default currency. In this example, we’re adding the British Pound (GBP), while the current default currency is the United States Dollar (USD).
- Set the Status to Yes to enable the currency.
- Click Save.
Repeat the steps to add other currencies to your site.
To set a new default currency, navigate to International → Localization and head to the Configuration section. Click on the Default currency drop-down menu and choose the desired currency. Click Save.

If you want to update the exchange rate, go to International → Localization → Currencies. Under the Exchange rate section, click Update.

Important! To auto-update the exchange rate, create a cron job job directly from the server via SSH or your hosting account’s admin panel.
How to Reset the PrestaShop Admin Password
If you forgot the admin and password of your PrestaShop website, easily reset it using the password reminder function on your login panel. However, if you don’t have access to your email, you need to do it manually.
This section of our PrestaShop tutorial will show you how to reset your password via the login panel and manually.
Method 1: Reset Your Password from the Login Panel
If you can access your email, follow these steps:
- Go to PrestaShop’s login panel and click I forgot my password.

- Enter the email address that you used on the registration process and click Send Reset Link.

- Check your inbox for the password reset email. Click the link provided in the email and set a new password.
Method 2: Reset Your Password Manually
If you can’t access your email, the best way to reset your password is via phpMyAdmin. Follow the steps below to do so:
- Go to hPanel. Under the Files section, access the File Manager.
- Navigate to your site’s directory – if you installed PrestaShop in the root folder, open /public_html/. If you installed it on a subdirectory like yourdomain.com/store, then open /public_html/store.
- Open the app → config folders, then locate a file named parameters.php. Click to open it.

- Find and copy the cookie_key within the quotation marks.
- Access your PrestaShop database by going to Databases → phpMyAdmin.
- Type in employee on the filter bar and select the (prefix)_employee table. The default prefix is ps.

- Click Edit.

- Find the password field, paste the cookie_key you got earlier and type the new password right after it. There should be no space between the cookie_key and the password.

- Click Go to save the changes.
To test if the new password works, head over to your login panel and try logging in.
How to Change PrestaShop Domain Name
It’s possible to change your PrestaShop domain name using two methods – through your site’s admin panel or via the hPanel.
Method 1: Changing Your Domain Name Through the Admin Panel
Follow the steps below to change your PrestaShop domain name through the admin panel:
- Log in to the admin panel, then go to Shop Parameters → Traffic & SEO.

- On the SEO & URLs page, navigate to the Set shop URL section.

- Enter your new domain name on the Shop domain and SSL domain fields.
- Leave the Base URL field as it is. The / indicates that you’re installing PrestaShop on /public_html/, which is the root directory. If you installed PrestaShop on a subdirectory, such as /public_html/store, the base URL would be /store.
- Click Save.
Method 2: Changing Your Domain Name Through hPanel
If you don’t have access to the admin panel of your PrestaShop site, you can change the domain name via hPanel.
Here are the steps to change your domain name using hPanel and phpMyAdmin:
- Open the hPanel, then navigate to the Databases section. Select phpMyAdmin.
- Type in shop_url on the Filters search bar. Once you find (prefix)_shop_url, click to open it.

- Click the Edit button.

- Change the domain and domain_ssl value with your new domain. If your site doesn’t use SSL or you are unsure about it, fill the domain_ssl value with the same URL as the domain field.

- Click the Go button to save the changes.
Now, you can access your site using the new domain name.
Conclusion
In this PrestaShop tutorial, we’ve covered the most essential aspects you need to know about installing and setting up a PrestaShop site. Let’s recap what was discussed:
- Installing PrestaShop. Use an auto-installer or do it manually.
- Set up pages. Improve your site’s SEO and provide more straightforward navigation for visitors.
- Install a theme. Establish a consistent, professional look for your eCommerce site even without advanced design skills.
- Set up payment methods. Add payment modules so that customers can use their preferred options.
- Add languages. Reach new customers by providing options to access your site in various languages.
- Add product pages. Specify product attributes and other details.
- Add an SSL certificate. Add an extra layer of security to protect your shop and customers.
- Set up currencies. Increase conversion rates by allowing customers to shop in their local currencies.
- Reset admin password. Restore your password via the login panel or manually via phpMyAdmin.
- Change PrestaShop domain name. Change it via the PrestaShop interface or phpMyAdmin.
Hopefully, this PrestaShop tutorial has answered essential questions you have about this eCommerce platform. Good luck with your new eCommerce business.
