How to Access and Use Hostinger Email

Do you need quick access to your mailbox while on the go? Set up your Hostinger email to stay on top of your activities throughout the day.
This can be easily achieved using an email client, such as Thunderbird or Outlook, or accessing your messages from your mobile device.
This tutorial will show you how to set up a Hostinger email across different email clients and devices.
Download Guide To Using Hostinger
How to Get Started With Hostinger Emails
In this video, we will go over the features of Hostinger email services.

Creating and Adding New Email Accounts
Before we begin, we’ll need to create a new email account in hPanel.
1. Access the hPanel and select the Emails section. From there, choose which domain you wish to manage:
2. Click on Create email account. Enter your preferred custom email name and password. Click Create.
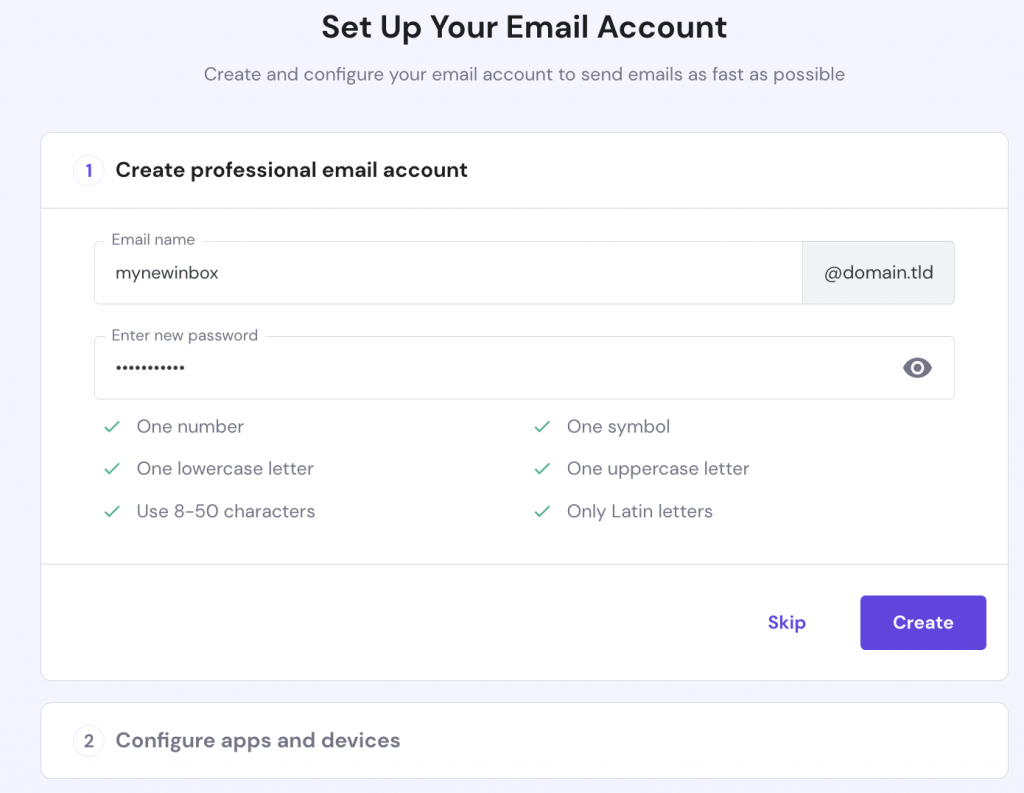
3. You’ll see your new email address under the Manage Email Accounts section.

For more information on how to create a professional email account, check our tutorial here.
In case you accidentally deleted an email account, you can easily restore it by following these steps:
1. If less than 15 minutes have passed after deletion, recreate the email account, and all of the data will be restored.
2. If the account was deleted more than 15 minutes and less than 7 days ago, contact our Customer Success team, and we will help restore your emails.
Keep in mind that after 7 days, all of the email data associated with the deleted account will be lost permanently.
Pro Tip
Looking to migrate from old provider to Hostinger? Check out our guide on how to migrate emails from another email provider.
Using Webmail in hPanel
Any email address you’ve created is accessible via a webmail client that allows you to read, compose, send, and receive emails using your desktop or mobile device
You may add the following link as a bookmark to your web or mobile browser and access your inbox quickly at any time. Just visit Hostinger Webmail and log in using your credentials.
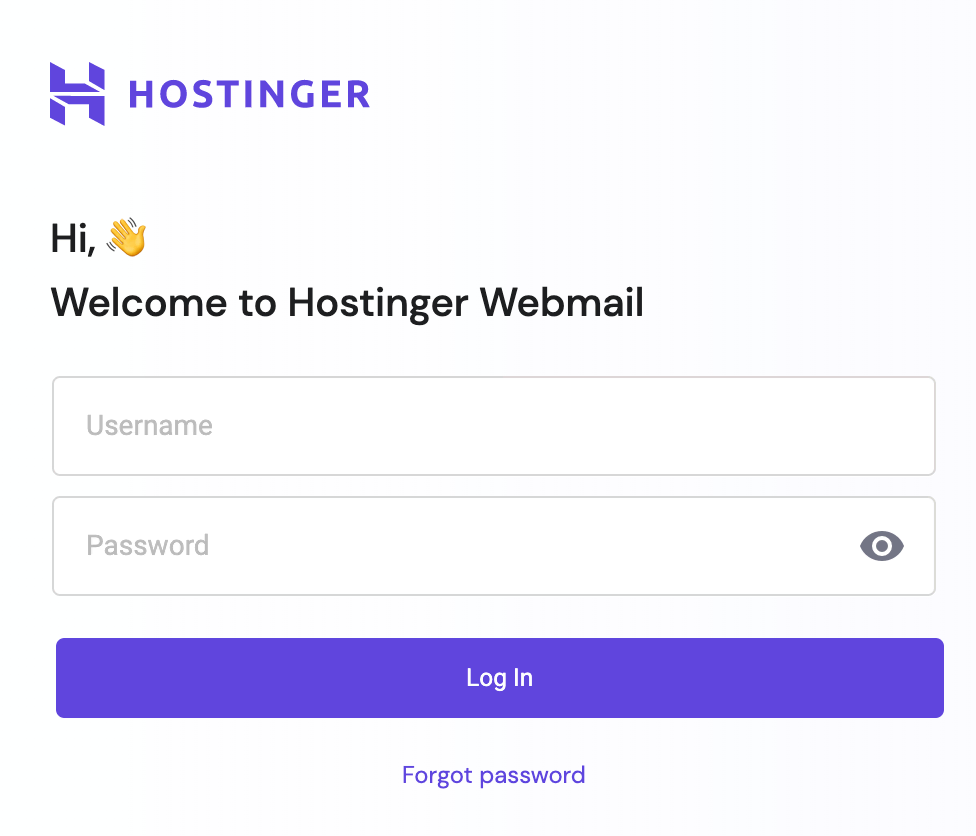
Another way to access your webmail is through the hPanel.
- Log in to your Hostinger account and click Email Accounts.
- Scroll down to the Manage Email Accounts section and click the Webmail button. It will direct you to the webmail client.
Using a Free Email Client
Using a free email application allows you to access your email messages even if you’re offline because you can download copies to your device.
On top of that, this will allow you to manage multiple email accounts from a single app without the need to sign in every time.
There are quite a few great email clients you can use. Here’s to name a few:
- Mailbird– it’s a simple, yet powerful desktop email client that helps you manage multiple email accounts. It allows you to easily integrate Gmail, Yahoo Mail, Office 365, and other online services, like your social media, and favorite productivity applications all in one place.
- Mozilla Thunderbird – it’s an open-source email client from the creators of Mozilla Firefox. It’s one of the most popular email clients out there, and, best of all, it’s completely free to use. You can sync your Google Hangouts or Twitter account, among other helpful features.
- Microsoft Outlook – known for its reliability, it is available on all major platforms, such as Windows, Mac, iOS, and Android. It allows you to schedule messages, sharing calendars with others, among other useful tools. However, you need an active Office 365 subscription to use the application on Windows or macOS devices.
- Apple Mail – a free mail client for Apple users with all the essential features one might need. It’s easy to use and is highly recommended for both beginners and professionals alike.
- Windows Mail – comes pre-installed with all new Windows computers. It offers basic email features to send, receive, and compose messages.
- Spark – another great email client for collaborative work and team management. It supports such popular email services as Gmail, Yahoo, Aol Mail, iCloud, among others. Both Free and Premium accounts are available.
- eM Client – one of the best email clients for Windows and macOS as it supports multilingual features, translating sent emails up to 39 languages. You can get a free license or upgrade to the Pro version, which costs a one-time payment of $49.95.
Before showing you how to configure your newly installed email client, let’s define the two types of protocols that connect you to the mail servers.
Setting Up IMAP vs POP3: Which One to Choose?
You’ll often come across two frequently mentioned words when email clients are involved – IMAP and POP3. These two Internet mail protocols are used by email readers when retrieving your messages from a mail server.
For example, the critical difference between the two is where your emails are going to be stored. IMAP will keep all of your messages, both the ones you’ve sent and received, on the server-side, while POP3 will store such data on a single device, such as your computer or mobile device
In short, we do recommend using the IMAP protocol for most of the cases listed in this guide. It’s often the more secure way to manage your emails and can be used to access your messages on multiple devices, unlike POP3.
When setting up your email, you’ll need to gather SMTP server settings for your outgoing mail. SMTP is another standard mail protocol used for sending messages from the email client to the server instead of retrieving it. You’ll find your email details in the hPanel by navigating to Emails -> Configuration settings -> Manual Configuration.
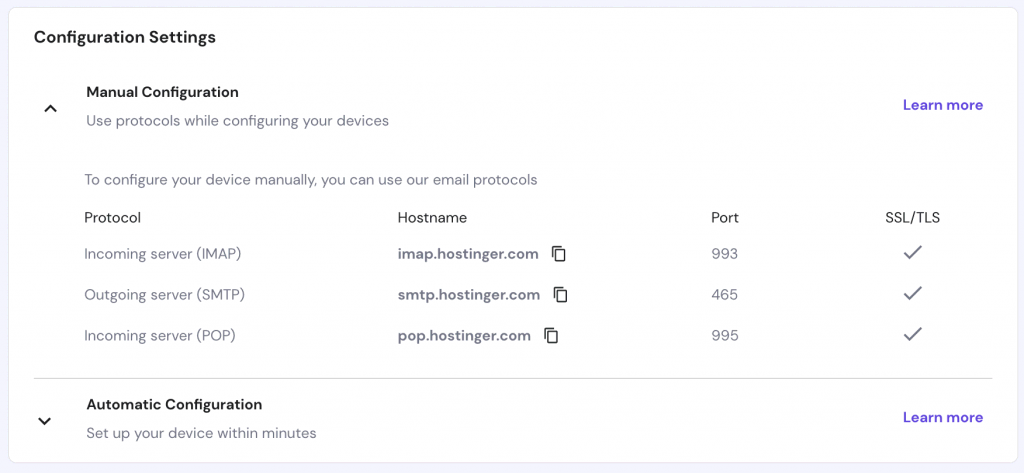
Save this information, as we will need it when setting up your email account.
Pro Tip
If you encounter encryption issues during the network testing process using port 465, you can opt for port 587. Check our guide on How to Check if Port 587 Is Open and establish more secure connections between your mail client and server.
Installing Thunderbird and Setting Up an Email Account
Mozilla Thunderbird is a free cross-platform email client available for both Windows and macOS.
Here’s a step-by-step guide on how to set it up on each platform.
Windows
- Download the installation file from the official page. It will automatically detect the operating system you are using.
- Once you’ve downloaded the file, launch the executable. Give it a few seconds for the extraction process to finish.
- If you have set restrictions on your computer, the User Account Control window will pop out, asking for your permission to run the application. Click Yes, and the installation wizard window will show up. Click Next to continue.
- Choose your Setup Type. You can freely choose the Standard option as it will install all of the most common features that you’ll need. Click Next to continue.
- Click Install to proceed. Uncheck the “Use Thunderbird as my default mail application” option if you’re using several different email clients on your computer.
- Once the installation is complete, a new window will prompt you to launch the Thunderbird client. Tick the box to launch the app and click Finish.
Now we’ll set up your email account using the email details we’ve copied from before.
- Once you’ve got the application opened, a new window will appear that will walk you through the email set up. Enter your name, including the email address and password you created before, and tick the box “Remember password”. Click Continue.
- Thunderbird will now try to acquire the email settings from the server. If successful, you will see a “Configuration found at email provider” message. Click Done.
- Now, the application will prompt you to set your primary email client. Choose Set as Default if you wish to make it one.
Pro Tip
If you’re unable to connect, you can try to enter the information by hand by clicking the Configure manually button.
macOS
- Once you’ve downloaded the installation file, double-click the .dmg file to run the application.
- Once a new window is opened, drag the Thunderbird icon to the Applications folder.
- Depending on the security restrictions set on your computer, you might need to verify the app before it can be opened. Click Open to proceed. Thunderbird might also ask for permission to access your contacts. Click OK.
- A new window will pop up, which will walk you through the email set up. Fill in in your name, email address, and password. Tick the “Remember my password” option and click Continue.
- If the connection was successful, the “Configuration found at email provider” message will appear. Select Done to continue.
- You’ll be prompted to use Thunderbird as your primary email client. Click the Set as Default option if you wish to do just that.
For more information on how to set Mozilla Thunderbird, check our guide on Thunderbird email setup.
Setting Up an Email Account With Outlook
Outlook is another great cross-platform email client, known for its reliability and robust email features that are perfectly suited for managing multiple email accounts.
Here’s how to install Outlook on different platforms.
Windows
Unfortunately, there’s no free version available for Windows. To download it, you’ll need to sign up for a Microsoft 365 account, which starts from $6.99/month for personal use.
Pro Tip
Microsoft Outlook shouldn’t be confused with the default Mail application found on Windows 8.1 and Windows 10. Additionally, you might already have Outlook on your computer if you bought it with Microsoft Office pre-installed.
If you have Microsoft Office already installed on your computer, skip to the fourth step of this guide.
- Download and launch the Office installer. Ensure you have a stable Internet connection as the installation wizard will download the remaining files for you.
- Once done, open the application on your computer and click the Get started button.
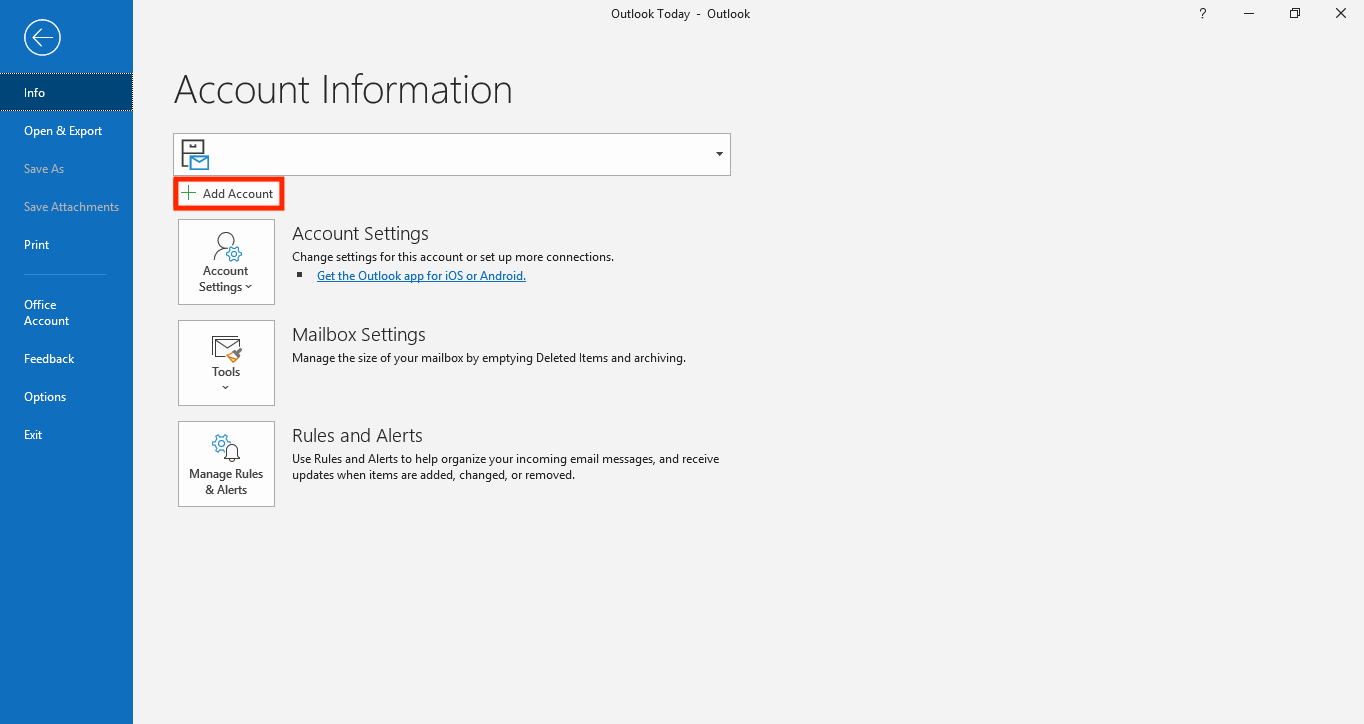
- Click the File tab located on the upper-left. In the Account Information window, click the Add Account button.
- Enter your Hostinger email information we’ve copied from before and click Connect.
- Outlook will automatically take you to the Advanced Options. You’ll be given a choice to select your provider type. For this tutorial, we’ll be using the IMAP protocol.
- Enter your incoming and outgoing server details. You can find this information in the Email Accounts section in hPanel. Click Next.
- Enter your password and click Connect.
- Wait a few moments, and Outlook will show you the “Account successfully added” message. You can click Done to close the window or add another email address if you wish.
macOS
First off, we’ll need to download the app from either the Mac App Store or download the installation package from the official page. If you downloaded the installation file, here’s how to install Outlook on your computer.
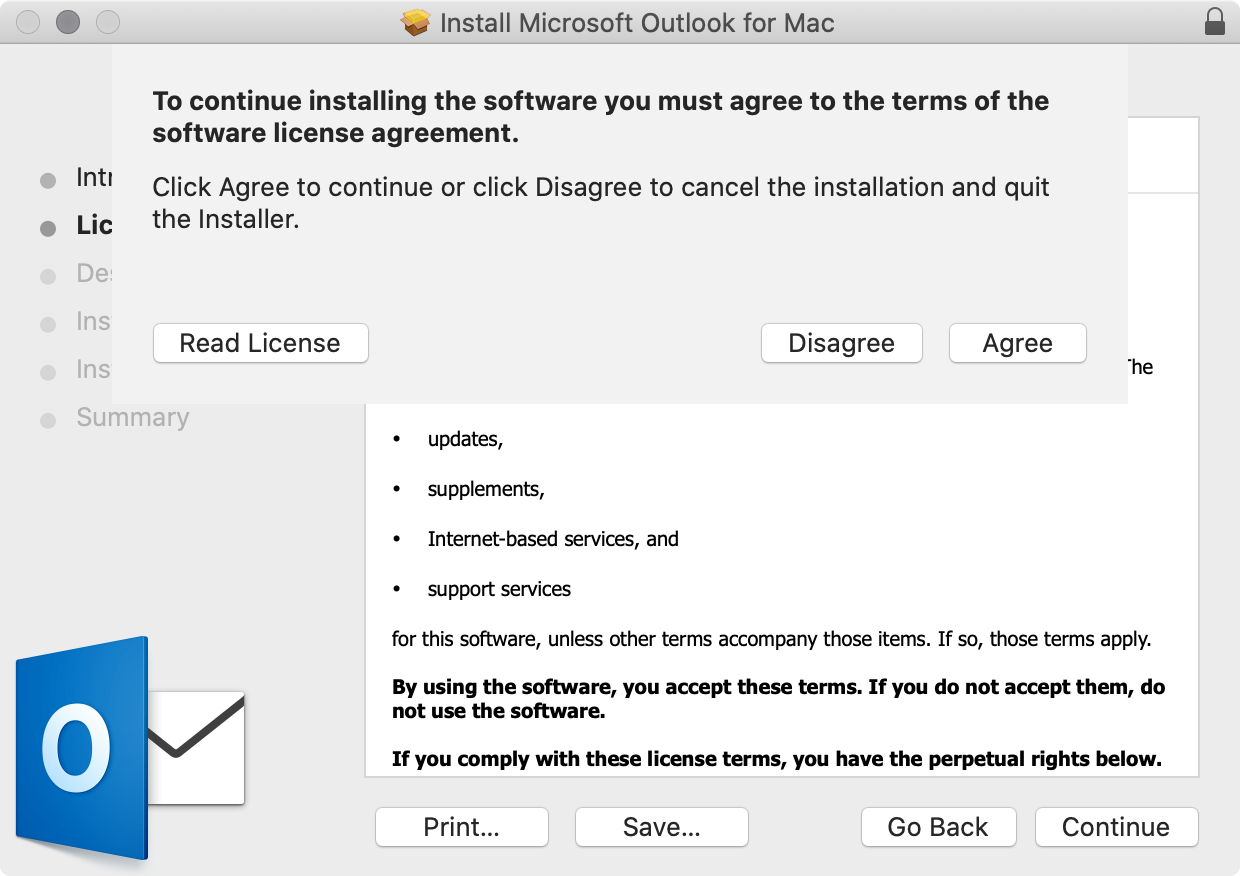
- Find the newly-downloaded file. Once the installation window will pop up, click Continue.
- Click Agree to proceed with the installation.
- Select the destination for your email client and click Continue.
- For the Installation Type, read the following instructions and then hit Next.
- If you’ve set restrictions on software installation, a window will pop out, requiring you to fill in the administrator username and password before installation. Click Install Software to proceed.
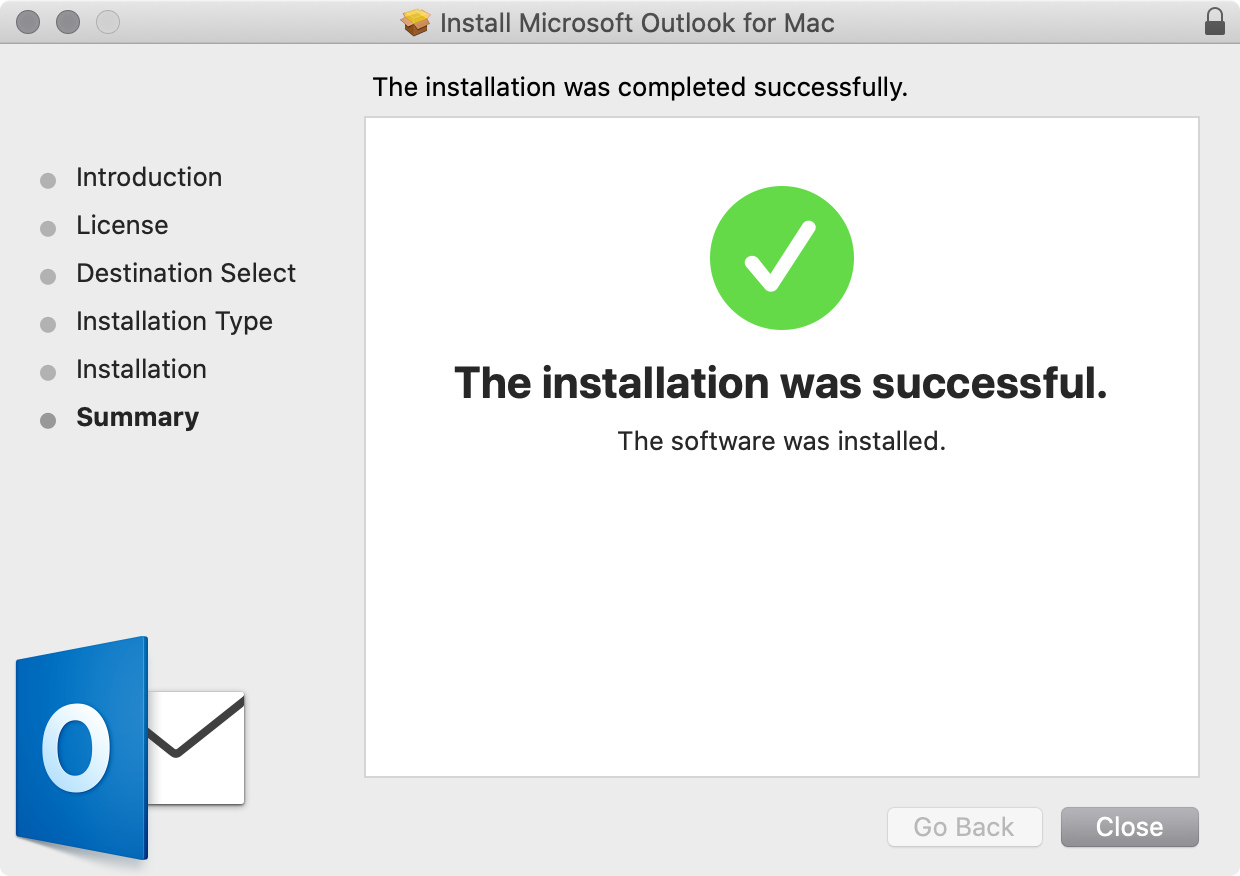
- Wait for a few seconds to complete the installation.
Now, let’s set up your Hostinger email account using email details we’ve copied from before.
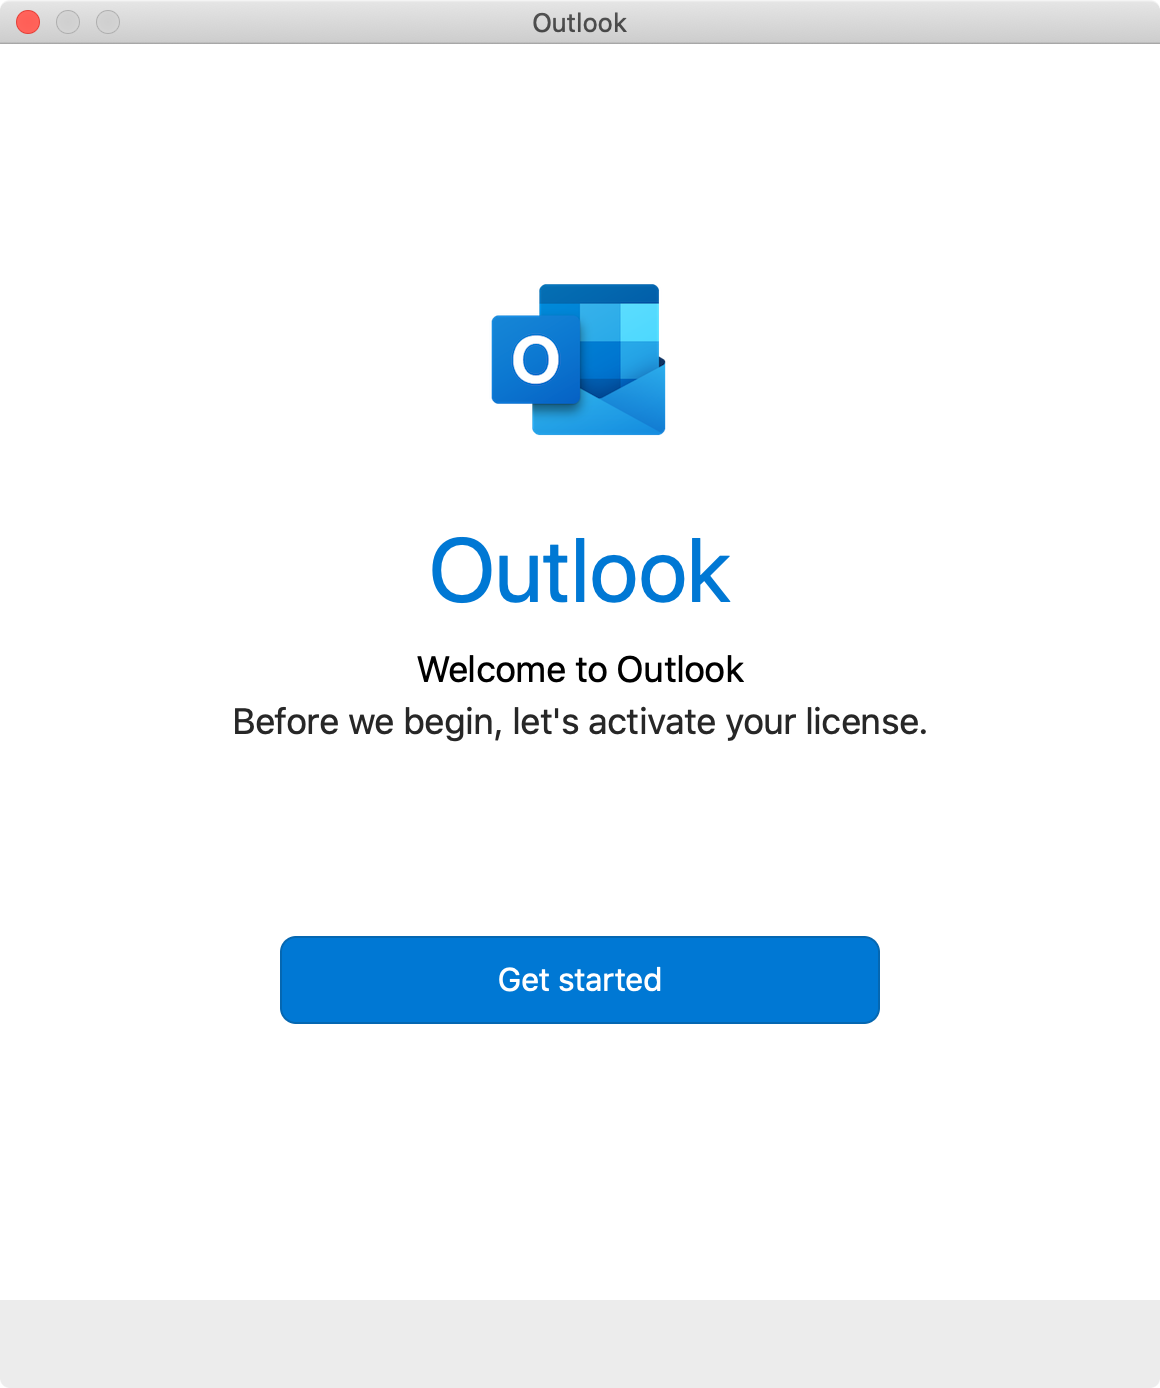
- Launch Outlook and click Get started.
- If you haven’t made the purchase or already have an active Office 365 license, you can log in to your account from here. Once another window shows up, click “Start Using Outlook”.
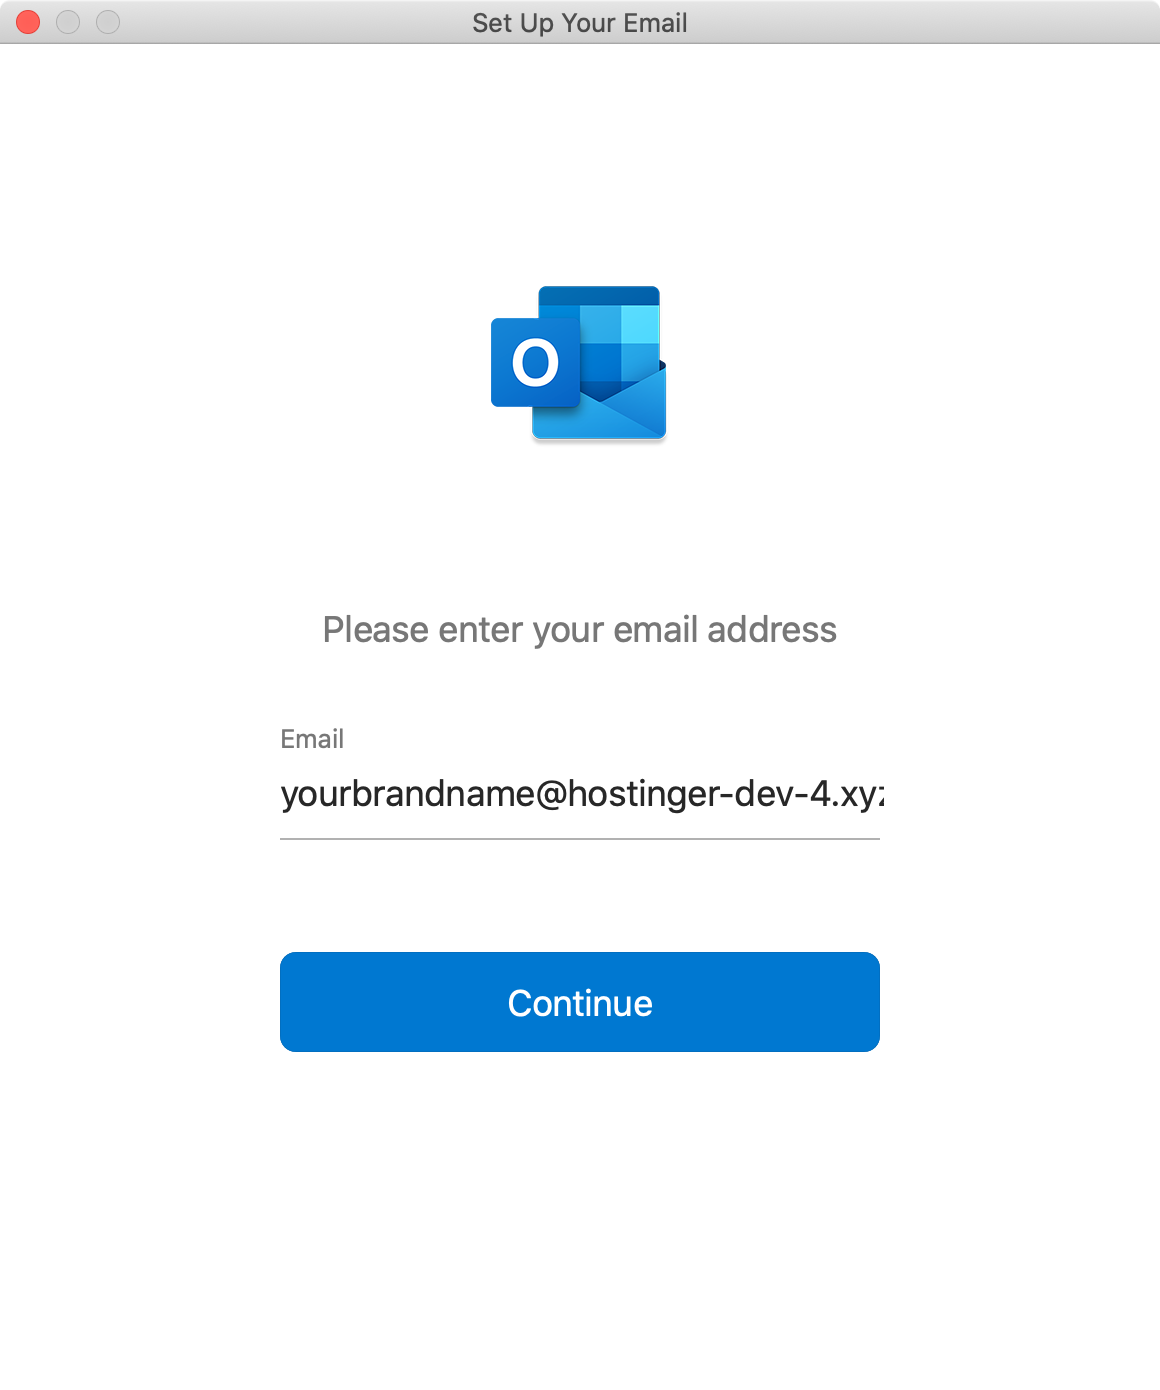
- Outlook will automatically detect email accounts linked to your account if there are any. If this is the case, click the Add Others button instead. If not, you’ll be automatically moved to the “Set Up Your Email” window.
- Enter your Hostinger email address and click Continue.
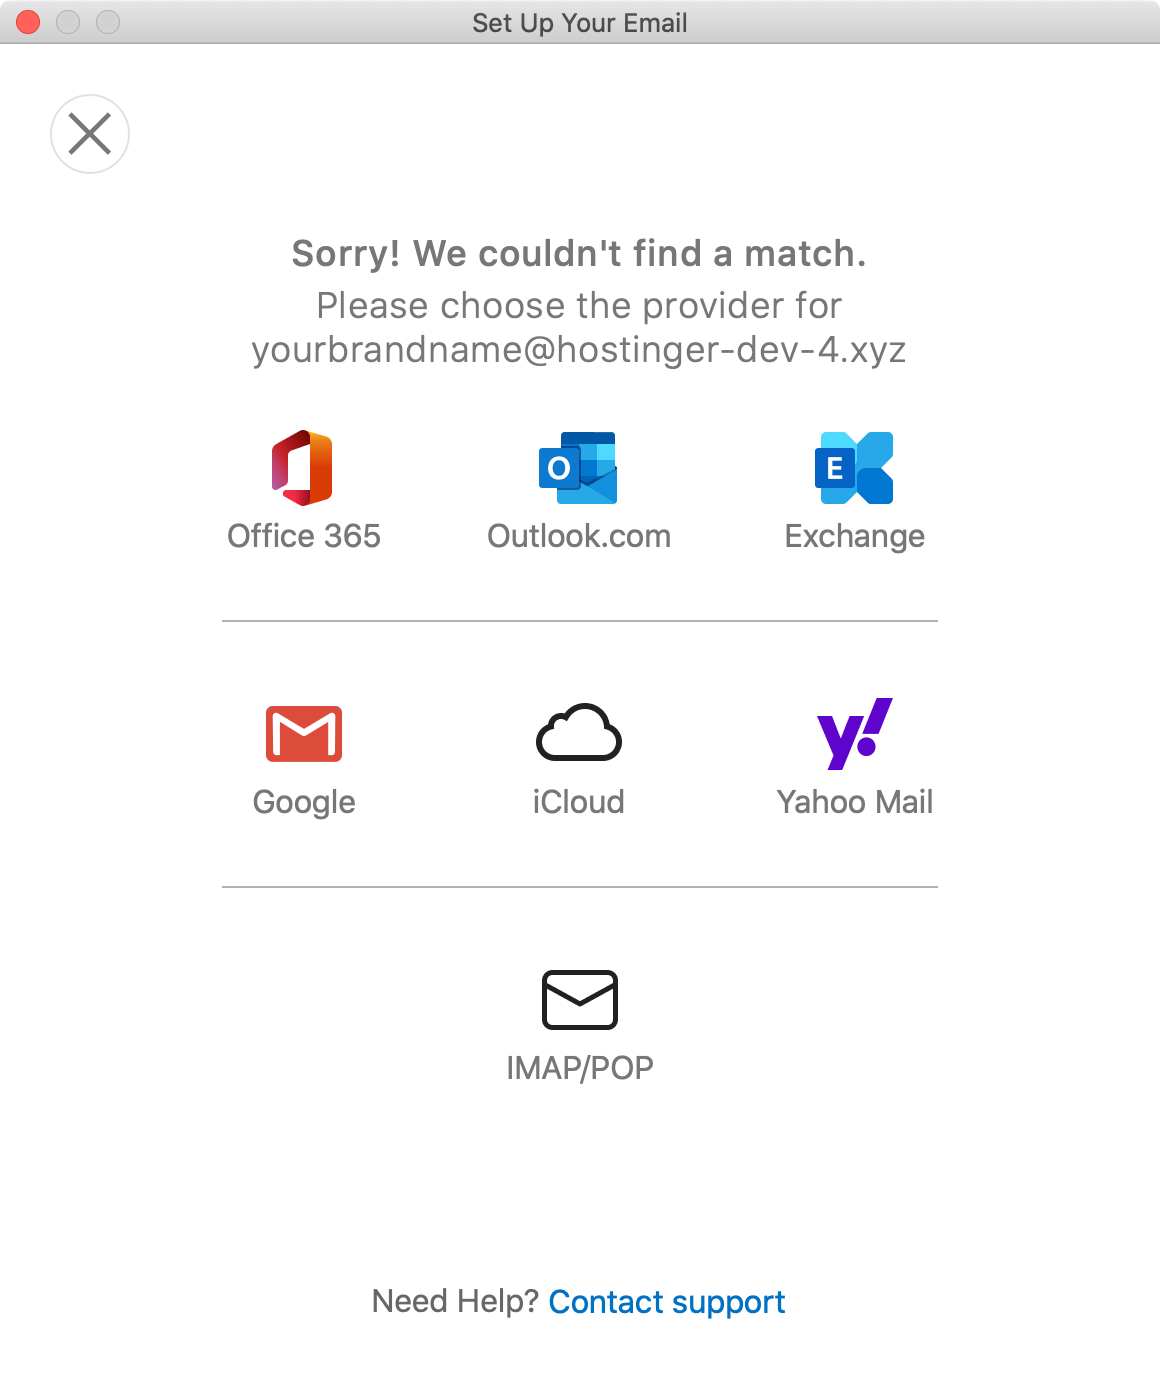
- If Outlook failed to detect the email provider automatically, click the IMAP/POP option in the following window.
- In this tutorial, we will use the IMAP protocol, so make sure that option is selected. Enter your email settings for incoming and outgoing mail servers and after filling out your email details, click Add Account.
- Click Done to close the window.
If you need further assistance, you can check our complete guide on how to set up Outlook.
Apple Mail
On macOS devices, you can set up your Hostinger email account with Apple Mail.
- Launch the app. If this is your first time, a window will pop up, showing available email services for you to choose from. Otherwise, click Mail located in the application menu and click Add Account.
- In the same window, select Other Mail Account and then Continue.
- Fill in your information and click Sign in.
- If the app fails to verify your account automatically, you can configure the settings manually. For the Account Type, select IMAP. Click Sign in.
Mail for Windows 10
Adding an email account to the Windows 10 Mail app only takes a few steps.
- Click the Windows Start menu and find the Mail app. If, for some reason, it’s not already pre-installed on your computer, you can download the app from the Microsoft Store.
- If this is your first time opening the Mail app, you’ll see a “Welcome to Mail” window. To get started, select Add account.
- If you’ve used the Mail app before, click the Settings (cogwheel) icon at the bottom left and select Manage accounts. Then click Add account.
- Since we’re setting Hostinger email, click Other account.
- Fill in your email address, the name you would like to use, and your password.
- Once that is done, hit Sign in. If successful, your data will start syncing immediately. Confirm by clicking Done.
Using an iOS or Android Mobile Device
If you want to set up your email account on an iOS or Android device, we will show you how to do just that.
iOS
You don’t have to download any third-party apps to your iOS device since the default mail client comes pre-installed with all iOS devices.
- On your iOS device, go to Settings and then Passwords & Accounts. Select the Add Account option located at the bottom.
- You’ll see several available email services. Choose Other to set up your custom email account.
- Select Add Mail Account.
- Select the IMAP option in the following window. Use the email settings we copied at the beginning of this guide to complete the process. Once that is done, click Next.
- Toggle the apps that you want to associate your email account with and click Save.
- Go back to the Passwords & Accounts section. If you now click the Mail app, you’ll see the email account you’ve just added.
We’ve prepared a more detailed guide on setting up an email account on your iOS device, which you’ll find here.
Android
To set up an email account on your Android account, follow the steps below.
Pro Tip
While the given examples might appear different depending on the mobile phone brand you’re using, the overall process of setting up your email on an Android should appear similar no matter the device.
- Launch the default Email app on your smartphone. You’ll be given a choice between different email providers. Click Other to set up your email account with Hostinger.
- Enter the email address and password we’ve copied previously and click Manual setup.
- Select the IMAP account as your account type.
- In the Server settings window, enter your email details. Click Sign in to complete the setup.
- Wait a few moments for the setup to complete. Once that is done, you should see your newly added email account ready to be used.
For further information on setting up an email account with Android, check out our guide here.
How to Manage Your Hostinger Email With Gmail?
Setting up your Hostinger email account to send and receive messages using your Gmail account is really straightforward.
- Open your Gmail account and click the Settings button in the upper-right corner. Then click See all settings.
- Go to the Accounts and Import tab.
- Scroll down and find Add another email address next to the “Send mail as” section.
- In the new window, insert your email details we’ve copied previously and click Next Step.
- Enter your SMTP server details, username, and the password you’ve used to create your Hostinger email account. Once done, click Add Account.
- Check your mailbox by logging in using Hostinger Webmail to open the confirmation email. Click on the given link to finish the process. You may also copy and paste the verification code in the pop-up window and click Verify.
- You can test whether everything was set up correctly by creating a new email message and checking the “From” section to see if your newly added account has been added successfully.
Alternatively, if you’re looking to use Gmail, you might be interested in Google Workspace email service at Hostinger, which will allow you to use other Google services such as Calendar, Google Drive and Google Docs.
How to Manage Your Hostinger Email Using Outlook.com (Hotmail)?
You can connect your Hostinger custom email to Outlook.com (previously known as Hotmail), where you can’t install the Outlook email client to your device.
- Go to Outlook.com and create an @outlook.com email account if you don’t have one already.
- Once you’ve access to your account, click the Settings (cogwheel) button on the upper right corner.
- Click View all Outlook settings. Go to Mail and then Sync Mail. Select the Other email accounts option.
- Enter your Hostinger email address and password. Under Advanced settings, tick the box that says “Manually configure account settings”.
- A new window will appear, showing all available connection type options. Choose the IMAP protocol option.
- Enter the email details we’ve copied previously. Click OK.
- Once you’re done, you will see your newly added Hostinger email account under the “Manage your connected accounts” section. If you want to use your Hostinger email account to send emails by default, you can change it under the “Set default From address” section. Click Save.
You can now use your Outlook.com account to send, receive, and manage your Hostinger email messages.
Conclusion
Setting up your custom Hostinger email account with an email client is easy, no matter the device you’re using. Simply make sure you have a copy of your Hostinger email details whenever you configure your IMAP or POP3 mailbox.
For quick access to your emails, you can use the Hostinger Webmail link on any web browser. However, you can only manage a single custom email account using this method.
If you’re going to use Thunderbird or Outlook, you have the option to set up multiple custom email accounts and manage them from one place.
If you don’t want to install any third-party software, you can always opt for the default mail apps found on Windows, macOS, iOS, and Android devices.








Comments
December 10 2021
Hi I setup my hostinger email with Windows mail. It took everything by itself. I can receive emails. The issue is sending email. I can see the app configured it "smtp.hostinger.com:587:1". I think it should be good but I am not able to send emails. It keeps in outbox and drafts. I can send email through webmail but issue is with Windows mail. Can you please advise. Thanks
December 14 2021
Hi, I would suggest to try editing the configuration to smtp.hostinger.com:587. Alternatively, you can give it a go with the port 465. If that won't help, I suggest you reach out to our Customer Success team - I'm sure they'll resolve it for you in no time!
September 04 2022
Could you explain, please, why do we need to use Hostinger to access our Outlook emails hosted on the Microsoft web site?
September 09 2022
Hey! You can use email clients such as Outlook to view your Hostinger emails (business email accounts that were created at Hostinger). However if you have paid email services elsewhere, you can resume using them or if you wish you can migrate all your emails to Hostinger for simpler management as one domain can be pointing to one email service at a time ?
November 15 2022
Hi, we want to shift to Outlook or Gmail for personal reasons and not go ahead with webmail... We aren't able to answer the technical questions mentioned in the IMAP or POP3 and they are confusing us a lot... Please help!
November 18 2022
Hey! Please refer to this article to learn how to setup your emails on an email client such as Outlook or Gmail.
January 03 2023
Hi, How can I set my picture in the profile of hostinger mail.
January 06 2023
Hey there! Email profile pictures usually depend on the email client, it's mainly used by Gmail, hence if you wish to have a profile picture for your email, you can add your email account to Gmail by referring to this article and then setup your profile picture.
January 31 2023
Hi, How can use Phpmailer in hostinger using smtp?
February 02 2023
Hey! You can use PHP Mailer with SMTP with our email services, you can check out this article to learn how to set it up.
April 09 2023
My sending emails reach the spam folder of the receiver. I set SMTP in my WordPress site still nothing changed. I am using Hostinger mail service. I have been trying to fix it for a long time but nothing seems to be changed. Now, you are the hope. Kindly, help me out with this problem.
April 14 2023
Hello there! I would highly suggest going through each method listed in this article. Also as mentioned in the article, it's a great idea to check your email's reputation via tools like Mail Tester. It will give you a comprehensive description of why your emails could be going to spam folder.
August 10 2023
I need API sample to intgrate with send mail using asp.net
August 11 2023
Hello there! We don't support ASP.net on our shared and cloud hosting plans. If you want to use it, I would recommend going for our VPS plan and choosing ASP.net template. As for sample, try this tutorial.